Showing posts with label food. Show all posts

Thursday, October 24, 2013

Thinking "GREEN" when preparing lunch snacks saves YOU money!

My kids love snacks in their lunches…sometimes I think they would prefer that their lunches consist of ONLY “snacks”. 

Prepared snacks are convenient, but expensive.  I send a lot of homemade snacks, but sometimes my kids just want to feel like the other kids around them with “individually wrapped snacks”.  (Is there something intrinsically pleasurable about having a “flashy colored wrapped” snack?    Or is it just the desire to feel like everyone else?)  HOW do I accommodate this desire, keep it healthy AND keep it affordable?

My kids like raisins.   
I bought a bag of small raisin filled boxes on a Halloween clearance about 3 years ago.  These boxes do NOT need to be a single use!!  I have my children bring them home.  When I have enough empty ones, I refill them.  They are just as convenient as the prepackaged mini boxes!  It only takes about 10 minutes to refill them all by myself…and 5 minutes or less IF the kids are helping me refill them.

Here are pictures of how simple it can be!
Step 1: Get Out Your Supplies
Step 2: Fill The Boxes
Step 3: Store Then in an EASY convenient container for on-the-go snacking!
Step 4: Make Sure You Have a Place to Keep the "Empty Boxes"so They Don't Get Lost or Broken!
 Happy Stretching Pennies...

Tuesday, October 22, 2013

Great Price! Out of Stock?? NO PROBLEM!

I was on a church task with a friend, when we drove by a certain grocery store on our way home.  I asked her if she minded my running into to pick up a fabulous sale item, so I didn’t have to turn around later to go back to pick it up.  (It was the last day of the sale.)  She agreed to stop.  When we got to the sale item’s location—there weren’t any left.  My inner voice said, “Darn.  I put off going to the grocery store too long!   My verbal response surprised my friend, “Oh well.  I guess I’ll just have to ask for a rain check.”

Apparently, she had never heard of such a thing.  A good sale doesn’t need to pass you by just because they ran out!!  Just go to the cashier and ask for a “rain check”.  They will pull out a copy of the ad and write all the pertinent information on their “rain check slip” in order for you to pick up that sale item at a later date when they have it in stock. 
Typically a rain check is good for 30 days after the day it is issued.  Just don’t lose the paper in the abyss of your car, the stack of papers in your kitchen, leave it in your pocket to be laundered, or watch it fly away in the wind.  (My habit: I put the rain check in my purse with my receipts.  When I got home I take it out and attach it to my fridge, on top of my budget sheet, with a magnet.)

There are a few exceptions to the rule.  Rain checks are not offered on :
1. Case Lot Sales
2. When noted in small print.  (This is more unusual, but it does happen.)

Happy Stretching Pennies…

Tuesday, October 1, 2013

TIME is MONEY: Fast & Inexpensive Fruit Cups!

Now that school is well under way, I hope everyone has settled into a nice routine!  For the most part, we have—though my surprise surgery threw us off for a while.

Do your mornings feel rushed?  Do you find yourself throwing your kid’s lunches together in the morning?  Are you putting the same things in their lunches day-after-day and getting just as bored as they are….or do you find yourself purchasing a variety of “convenience” lunch items at the store (that are vastly more expensive…therefore draining your food budget) ?

Assembling your children’s lunches (or your own) does not need to be such a chore or so expensive if you MASS PRODUCE items!  Think “freezer”!

Premeasured fruit cups at the store are convenient…but oh-so-expensive.  Opening a single can of fruit and dividing into 3 Tupperware containers is less expensive, but occupies more time than the grab-and-go style.  BUT…there is a way to make it MUCH less expensive and just as fast as the grab-and-go style!
 
TIP: This is a great trick is wonderful if you have picky eaters OR have a child who has allergies!

Here’s HOW:

  1. Purchase LARGE cans of fruit—(think coffee can).   Sometimes pre-diced fruit is available…thus saving you time!  Places like Costco, Sam’s Club, Cash-n-Carry, and restaurant supply stores carry these large cans of fruit.
  2. Pull out your muffin tins and fill them up with your favorite combination of fruit…to the top!
  3. Freeze until FIRM!  (think—one day)
    Please excuse my messy freezer & notice the muffin tin on top freezing for the day....
  4. Fill the bottom of your kitchen sink with approximately one inch of warm water.
  5. Take your muffin tin from the freezer and place in your kitchen sink for approximately 1 minute.
  6. Use a knife and gently remove from the tin.  (If it doesn’t easily move, place muffins tin back in the kitchen sink for another minute and try again.)
  7. Place each frozen cup in its own sandwich fold top baggie.  (They are in their own individual baggie so they won’t stick to one another! )
  8. Place all the bagged up cups inside a gallon Ziploc bag, labeled with the date and contents, and place in your freezer!
  9. For Lunches:  Take a baggie out of the freezer.  Dump the contents into a Tupperware.  Put the lid on and place in your lunchbox.  It will thaw and be ready for consumption at lunch time--just like you took it straight out of the freezer!
    Can you tell I got a new camera?  (I took the other pictures last spring!)
 Happy Pinching Pennies...

Monday, May 20, 2013

TIME is MONEY: Fast Homemade meals from the freezer!

I had surgery last week.  I was blessed to have friends who brought us dinner 3 days, which made dealing with not feeling well easier…and my family was well taken care of. 

THIS week I am still not up to my normal self…but our life is back to normal “light speed” and isn’t being very accommodating to my recovery.  When I looked over my schedule this week, I thought there is NO way I can expect to cook a homemade meal on three days this week.  (I feel very blessed to have stumbled upon www.freezerdinner.com years ago and subsequently purchased the book, “Fabulous Freezer Meals” by Jenny Stanger…which led to experimenting with homemade meals that my family would like from the freezer.)   So…I went to my freezer and picked out 3 meals that I had previously made and frozen.  
An ACTUAL peek into my freezer...

What I WISH my freezer looked like...
 WHAT are the 3 meals this week that will be whipped up FAST and with very little dirty dishes?
          1)      Pot Stickers
          2)      Qdoba style burritos
          3)      Taco Soup

Below, I have included these family freezer favorites!  (I have plenty more freezer recipes…This is just the tip of the iceberg so-to-speak.)

Freezer Meal #1: Pot Stickers 
 (by Jenny Stanger)
2 pkgs. Wonton wrappers (2 inch circles)
2 c. Cabbage, thinly sliced
1 heaping tsp. garlic, minced
5 links sausage (partially cook and then use a food processor)
1-2 tsp. ginger
1 green OR regular onion, chopped finely
2 tsp. soy sauce

To Prepare:
11.       Dice cabbage into very small pieces. 
a.       (Use the rest in a soup OR a side dish like cabbage and bacon)
22.       In a large bowl, combine all ingredients except the wonton wrappers.
33.       Lightly flour 2 cookie sheets. 
44.       Halfway fill a small bowl with water. 
a.       (To dip your fingers in.)
55.       Wet one side of the wonton wrapper and spoon 1-2 tsp. of filling in the center of the wrapper.
66.       Fold in half, like a taco and pinch edges closed.
a.        If the edges don’t seal, wet them with your fingers and pinch edges until the DO seal.
77.       Place pot stickers on a lightly floured cookie sheet and freeze for 1-2 hours.
88.       Put in a Ziploc baggie and LABEL and place in the freezer. 
a.       Pull out desired # pot stickers and follow cooking directions.
To Cook:
11.       Heat 2 Tbsp. oil in a nonstick skillet.
22.       Place frozen wontons in skillet on med-high heat.
33.       Add ¼ c. water and cover with lid to steam the pot stickers.
44.       Cook until liquid is gone—about 7-8 minutes.
55.       When pot stickers turn brown and crispy, flip them over.   (Like a pancake) 
66.       Add ¼ c. water and cook the other side until it is brown and crispy.

Dipping Sauce
3 Tbsp. soy sauce
3 Tbsp. water
3 Tbsp. vinegar
1+ Tbsp. brown sugar
3 cloves garlic, minced

Combine all ingredients and divide into individual small bowls for each person.


Freezer Meal #2: Qdoba Burritos  
(by Jenny Stanger)
(a combination of 2 recipes inside a tortilla)
·Serve with salsa and/or sour cream

Sweet Beans & Rice (by Jenny Stanger)
2 c. black beans
6 c. cooked rice
½ c. sugar

To Prepare:
11.       Cook Rice. 
22.       Gently fold in black beans.
33.       Add sugar and gently fold in.  Serve warm. 
44.       Put leftovers in a quart size ziplock bag.  Label and Freeze for later.

To Serve:
11.       Defrost in microwave .
22.       Serve inside a tortilla with Sweet Shredded pork/beef and salsa.

Sweet Shredded Pork or Beef (by Jenny Stanger)
3-4lb. pork roast or beef roast
2 liters Dr. Pepper/Root Beer/Pepsi
1 can (14 oz.) Pineapple tidbits, undrained

To Prepare:
11.       Place pork roast in a slow cooker.
22.        Pour soda and pineapple juice on top of roast. 
33.       Cook on LOW for 6 hours.
44.       Shred pork/beef in the slow cooker with two forks. 
55.       Place leftover in sandwich size ziplock bags with 1-2 Tbsp. liquid.  Label.  Freeze for later.

To serve: 
11.       Defrost in microwave. 
22.       Pour off extra liquid. 
33.       Serve inside a tortilla with Sweet Beans & Rice and salsa.

Freezer Meal #3: Taco soup 
(by Wendy Ashton)

1 lb. Ground beef
1 pkg. Taco seasoning
Add:
2 c. variety beans  (ex. Garbanzo, black, kidney, pinto)
1c. Mild picante sauce
Corn (frozen)
1 can stewed tomatoes
2 oz. Diced chilies
Olives (optional)
To Prepare:
1.       Throw everything in the crock pot in the morning, except the meat w/seasoning.
2.       Serve with crackers or tortillas.

To Freeze:
1.       I double the recipe…and freeze the second half for another day. 

To Serve: 
1.       Defrost halfway in the microwave.
2.       Throw in the crock pot to finish thawing and then the crock pot will finish cooking it.


Happy Pinching Pennies…

Wednesday, January 9, 2013

EASY Homemade noodles WITHOUT any special equipment

I hope everyone had a nice Christmas and New Year.  

Is anyone feeling more than a little cold right now?  Our temperatures have dropped to single digits almost every day…which more than uncommon for our area.  It seems most evenings; all I want to do is curl up in a thick cozy blanket.  Anything to warm a body is desirable!!

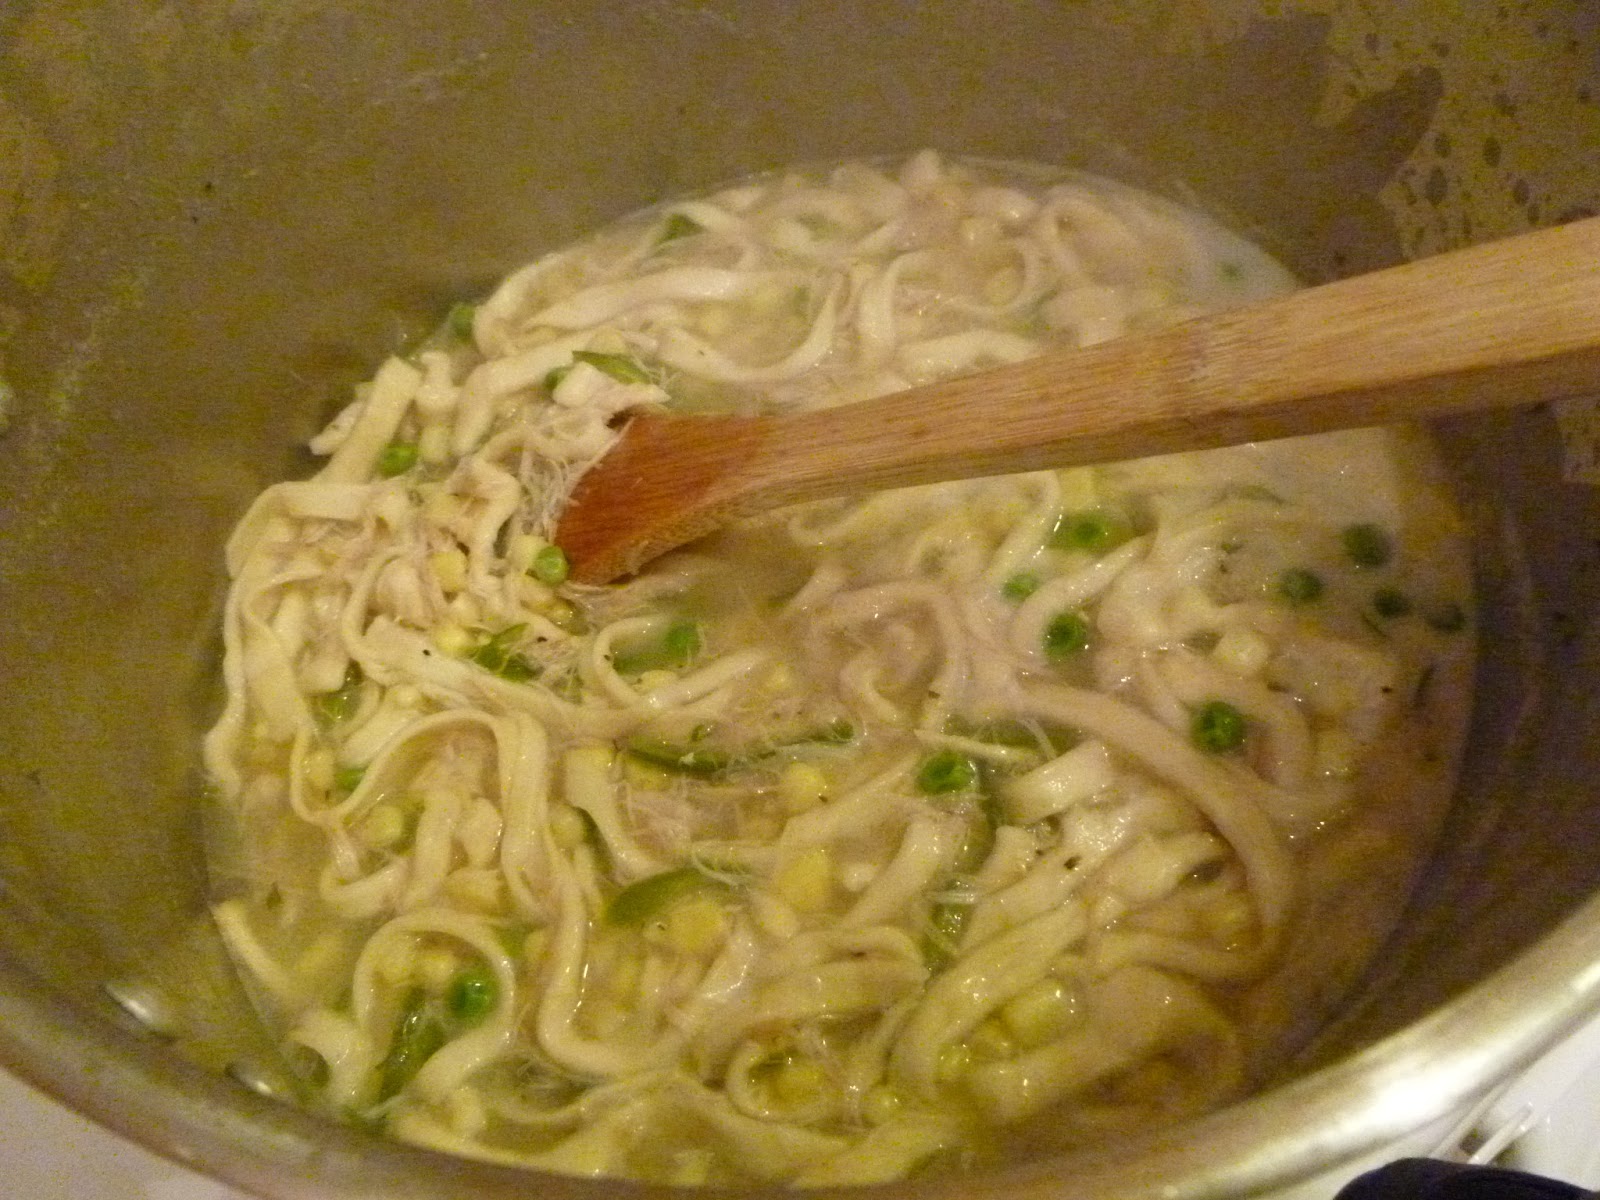
WHO wouldn’t want some homemade chicken noodle soup during this CRAZY cold spell??  It isn’t as hard as it sounds…I have a recipe in my favorite cookbook “Fabulous Freezer Meals” by Jenny Stanger that can be thrown together FAST…and since it is so quick, it can be easy to add some homemade noodles to it too.   Wait?  Homemade noodles?  That sounds complicated and time consuming!!!  Not true.  Homemade noodles sound a lot scarier to make than they actually are.  If you have the ability to make dough…and have a knife OR pizza cutter…you can make noodles fast.  You do NOT need a “noodle maker” device to enjoy them.  

(A special thank you to a friend who pointed out this neat idea over 2 years ago...)
 
Chicken Noodle Soup 
(recipe from “Fabulous Freezer Meals”- by Jenny Stanger)

4 c. Chicken Stock (or substitute with chicken broth)
6 c. water
2 c. frozen diced vegetables
½ lb. shredded turkey/chicken (for FAST assembly-use canned chicken and 2 forks)
1 ½ tsp. Italian Seasoning
1 tsp. salt
2 packages Country Gravy Mix
Noodles

1.       1. Mix together chicken stock, vegetables, chicken and seasonings.  Bring to a boil for 5-7 minutes.
2.       2. While soup is boiling, make the noodle dough.
3.       3. Add gravy mix and simmer 10 minutes.
4.       4. While soup is simmering, roll out the noodle dough and cut with a knife.
5.       5. Add noodles and boil for 8-10 minutes.

Homemade Noodles

2 1/2 cups all-purpose flour
1 pinch salt
2 eggs, beaten
1/2 cup milk
1 tablespoon butter
  1. In the bowl of a stand mixer beat the egg, milk, and butter. Remove the paddle attachment and replace with the dough hook. Add the rest of the ingredients.  Knead dough until smooth, about 5 minutes. Turn out onto a lightly floured surface and cover with a clean kitchen towel. Let rest 10 minutes.
  2. Divide dough into 4 equal pieces and roll each piece out to 1/8 or 1/4 inch thickness. Cut into desired lengths and shapes. (A pizza cutter works really well to cut them into strips.)
  3.  
Happy Pinching Pennies!!